How to Sell Digital Products with WooCommerce in 2026

Quick Take
Selling digital products with WooCommerce takes about 30 minutes to set up if you follow the right steps.
I’ve sold everything from AI Prompts Bundles, AI Automation Systems, eBooks, to Notion templates using WooCommerce, and after three years of trial, error, and a few Saturday morning panic attacks, I’ve figured out what actually works.
Disclosure: This article is sponsored by WordPress.com, but every opinion here is mine. I’ve personally used WooCommerce, for personal business and client work.
Why Write this? Because of a Download Link
How to sell digital products with WooCommerce starts with understanding that it’s not just about uploading files and hoping for the best.
Last November, a customer emailed me at ungodly hours because her download link expired before she could access the template she’d just bought.
I was in my pajamas, drinking wine (don’t judge), and frantically Googling “WooCommerce download link expired fix” while trying not to wake up my neighbors with my colorful language.
It was clear as day that most people set up WooCommerce digital products incorrectly from the start.
They skip the crucial settings, don’t test the customer experience, and end up troubleshooting at ungodly hours like I did.
So let me save you from that nightmare.
Why WooCommerce for Digital Products?
Before we dive into the how-to, let’s talk about whether WooCommerce is even the right choice for selling digital downloads.
The Good Stuff:
- It’s free (the plugin itself)
- Works seamlessly with WordPress
- Handles unlimited products
- You control everything (hosting, branding, customer data)
- Over 7 million active users can’t all be wrong
- Scales with your business
- No monthly platform fees like SendOwl, Gumroad, or Shopify
The Not-So-Great:
- You need WordPress hosting
- Initial setup takes time (about 30-60 minutes)
- You’re responsible for security and backups
- Customer support is on you
- Payment gateway fees still apply (2.9% + 30¢ typically)
Real talk: If you’re selling one or two digital products casually, platforms like SendOwl, Gumroad, or Stan Store might be easier.
But if you’re building a serious digital product business, WooCommerce gives you control and saves you money long-term.
I started on Gumroad in 2019. Paid $0 initially, then they switched to taking 10% of every sale. That hurt. Moved to WooCommerce in 2020, and despite the learning curve, I’ve saved a lot in platform fees.
What You Need Before Starting (Don’t Skip)

Getting crystal clear on requirements saves headaches later. Here’s what you actually need:
Technical Requirements:
✅ WordPress website (self-hosted on WordPress.org, NOT WordPress.com free)
✅ Reliable hosting (WPX, Kinsta, Bluehost, or similar – minimum $5-10/month)
✅ SSL certificate (most hosts include this for free)
✅ Payment gateway account (Stripe or PayPal at minimum)
✅ Digital files ready to sell (PDFs, MP3s, ZIP files, videos, etc.)
Before You Install Anything:
- Back up your website (use UpdraftPlus or similar)
- Know your digital file sizes (hosting has limits)
- Decide on pricing ($1.99 minimum recommended – fees eat up cheaper prices)
- Have terms of service and privacy policy ready (legally required)
Pro tip: I’ve found that a 500MB video course will time out during download on cheaper hosting. Keep individual files under 100MB or use cloud storage links instead.
Step 1: Install and Set Up WooCommerce
I am on the correct approach. This is where most tutorials get boring. I’ll keep it practical.
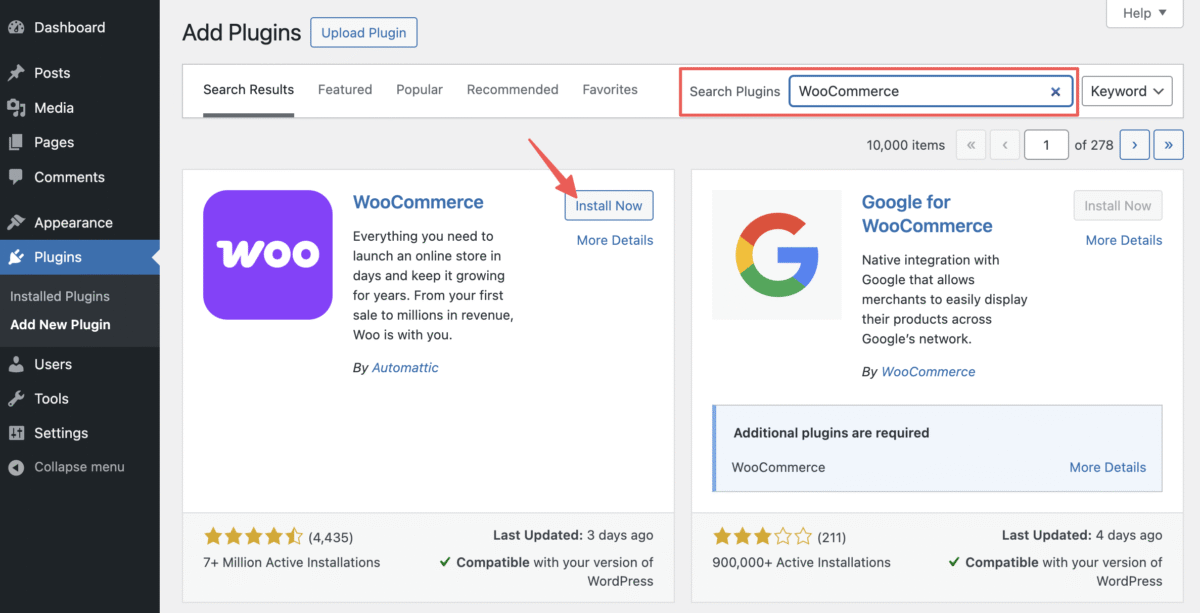
Installing WooCommerce:
- Go to your WordPress dashboard
- Navigate to Plugins → Add New
- Search for “WooCommerce” (by Automattic)
- Click “Install Now” then “Activate”
Boom. WooCommerce is installed. But don’t celebrate yet, the setup wizard is coming.
The Setup Wizard (What to Actually Fill In):
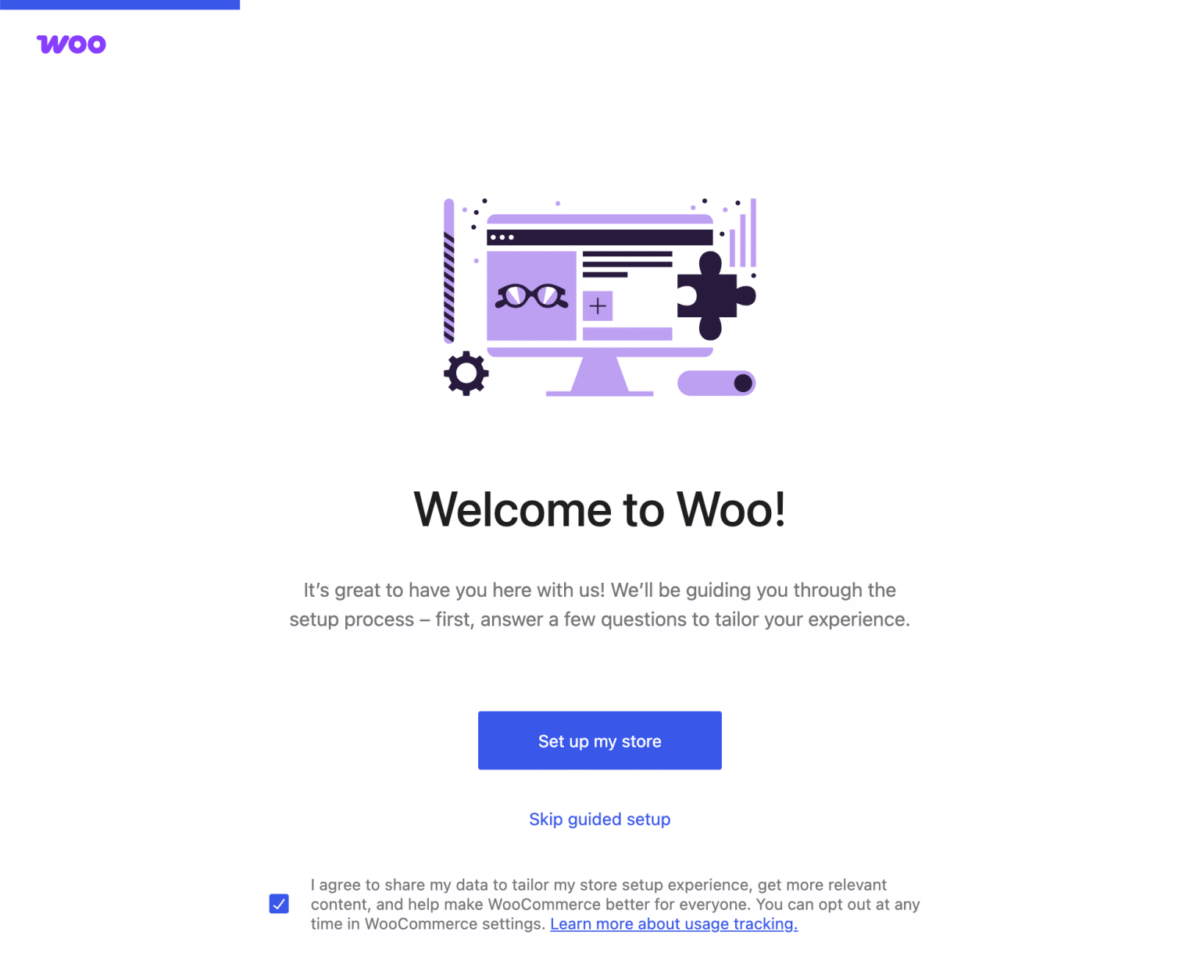
WooCommerce will launch a setup wizard automatically. Here’s what to do:
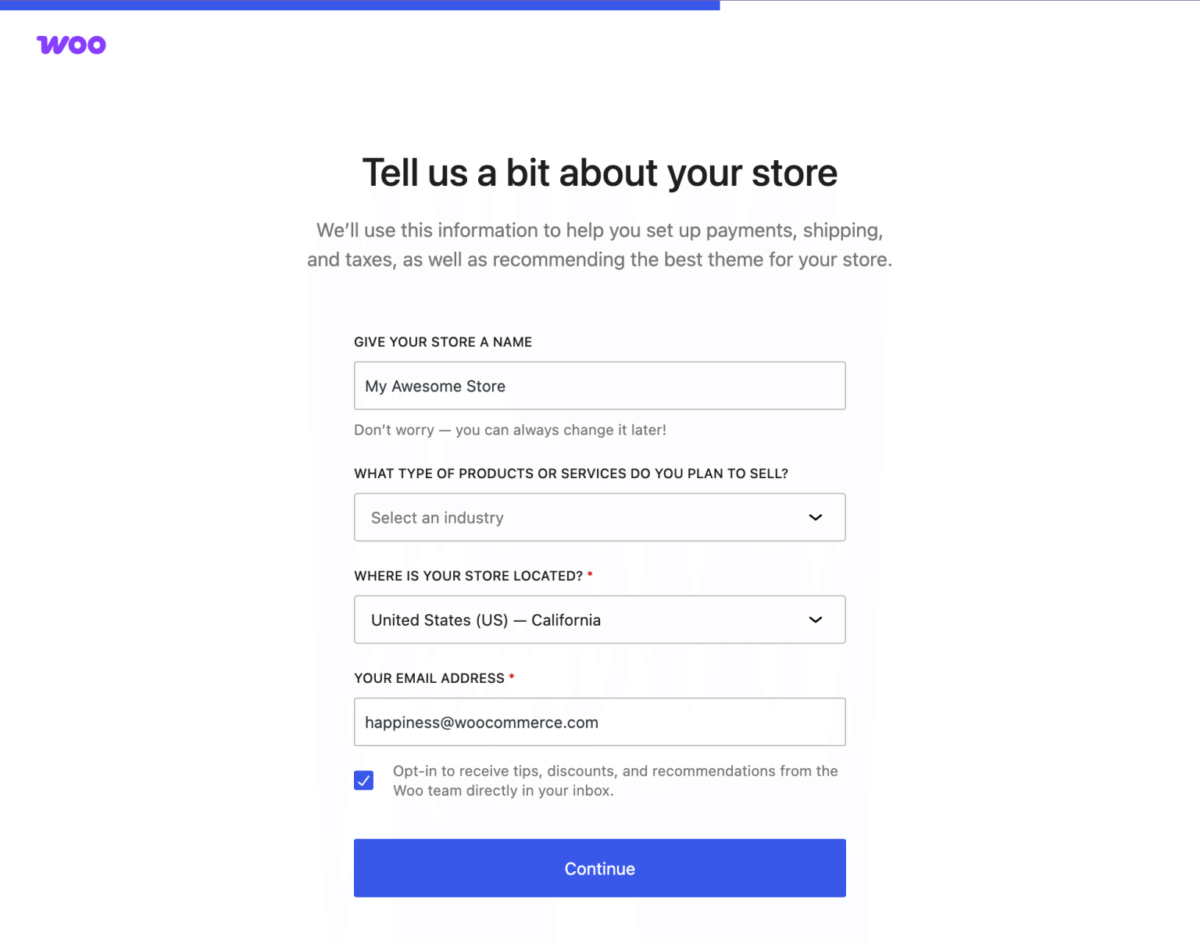
Store Details:
- Add your business name
- Enter your physical address (required for tax compliance)
- Select your currency
- Choose “Digital products” when asked what you’re selling
Industry:
- Select the category that fits best
- For digital products, I usually pick “Education and learning” or “Other”
Product Types:
- Check “Downloads” (obviously)
- Uncheck “Physical products” if that’s not your thing
- Skip “Subscriptions” for now (add later if needed)
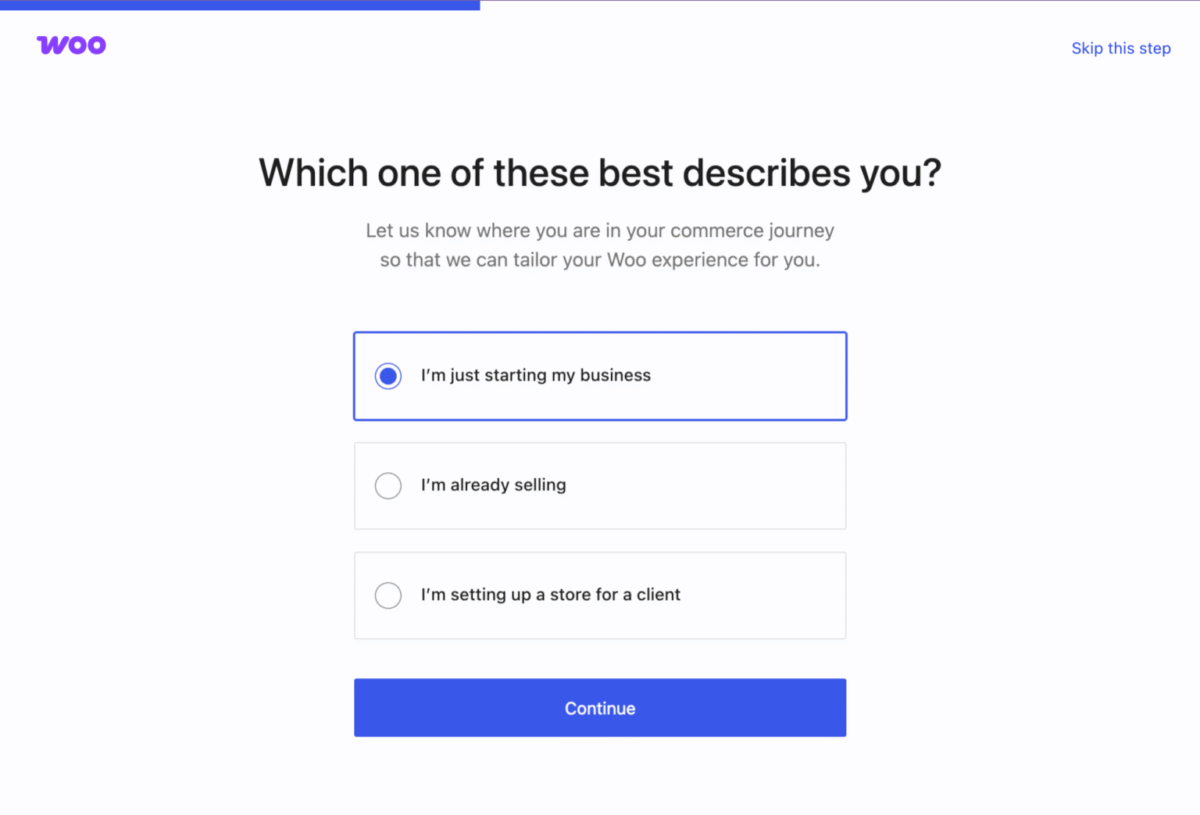
Business Details:
- Be honest about your revenue (this helps with recommendations)
- Select “No” for selling on other platforms initially
Themes:
- Skip theme selection for now (we’ll cover this later)
- Use your existing theme first
Jetpack and WooCommerce Services:
- Skip these unless you specifically want them
- You can always add later
Hit “Continue” and finish the wizard. WooCommerce is now installed but NOT configured for digital products yet.
Step 2: Configure WooCommerce for Digital Downloads (The Critical Part)
This is the part that saved me from future 2 AM panic attacks. Pay attention here.
Navigate to Settings:
Go to: WooCommerce → Settings → Products → Downloadable Products
You’ll see several options. Here’s what each one does and what I recommend:
File Download Method:
Three options:
- Force Downloads (RECOMMENDED for most people)
- X-Accel-Redirect/X-Sendfile (advanced, server-dependent)
- Redirect only (insecure) (avoid unless using external cloud storage)
Choose Force Downloads because:
- It hides your actual file URLs
- Prevents unauthorized sharing
- Works on 99% of hosting setups
- Most secure option
Only drawback: Large files (300MB+) might timeout on underpowered hosting. If that’s your situation, use external storage or upgrade hosting.
Access Restrictions:
Enable Downloads require login: YES (check this box)
Why? Without a login requirement, anyone with the download link can access your files forever. That link gets shared on Reddit, and suddenly your $97 course is being downloaded by hundreds of people who never paid.
I learned this lesson when someone shared a direct download link for my template pack on Twitter (Before the Musk takeover).
Lost probably $300 in sales before I caught it. Don’t be like 2019 Mia.
Grant access to download products after payment: YES (check this)
This immediately gives customers access once payment clears. Without it, they can’t download until you manually mark the order complete. That’s annoying for everyone.
Download Limits:
Limit file downloads to: I recommend 3-5 downloads
Why limits?
- Prevents abuse (customers downloading and then requesting refunds)
- Protects from link sharing
- Encourages single-purchase, multiple-device downloads
Too restrictive? Customers get mad.
Too loose? People exploit it.
Sweet spot is 3-5 downloads.
Download expiration: I set mine to 7 days
This means download links expire 7 days after purchase. The customer has a full week to download, which is plenty. If they come back later, they can access from their account page for a new link (doesn’t count against download limit).
Some sellers do 30 days or “never expire.” I’ve found that 7 days with account access hits the right balance.
Other Settings:
Append unique string to filename: Check this box
This adds random characters to your download URLs, making them impossible to guess. Extra security layer.
Save all settings at the bottom.
Step 3: Add Your First Digital Product (The Fun Part)

Time to actually create a product. This is where your digital masterpiece meets the world.
Creating a New Product:
Go to: Products → Add New
You’ll see the standard WordPress editor, but with WooCommerce-specific fields below.
Product Name and Description:
Product Name: This is your product title. Make it clear and keyword-rich.
Examples:
- ❌ “My Ebook” (boring, vague)
- ✅ “The Complete Blogging Roadmap: eBook for New Bloggers”
Product Description: This is your sales copy. Sell the benefits, not features.
I use this structure:
- Problem statement (what pain does this solve?)
- Solution overview (what they get)
- Who it’s for
- What’s included
- Transformation/results they’ll experience
Keep it scannable with subheadings, bullets, and short paragraphs.
Short Description: This appears on category pages. One punchy paragraph summarizing the product.
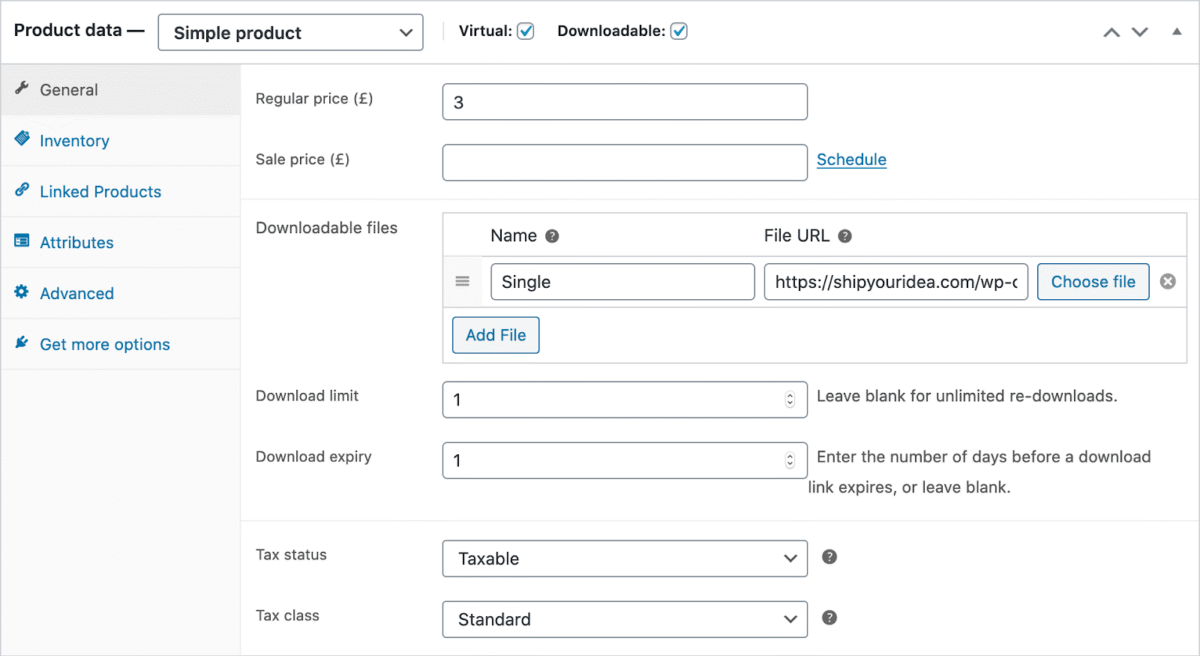
Product Data Settings:
This is the dropdown menu that says “Simple Product” by default.
Keep it as “Simple Product” (most digital products)
Check two boxes:
- ✅ Virtual (no shipping needed)
- ✅ Downloadable (it’s a digital file)
New tabs appear when you check “Downloadable.” Let’s configure them.
General Tab:
Regular Price: Enter your selling price ($19, $47, $97, whatever)
Sale Price: Optional. If running a promo, add the discounted price here.
Tax Status: Select “Taxable” or “None”
- If selling in the EU, you need to collect VAT
- US sellers: depends on your state and nexus
- Consult tax professional (boring but important)
Downloadable Files:
This is where the magic happens. Click “Add File”
File Name: What customers see (“Blogging Roadmap eBook.pdf”)
File URL: Two options here:
Option 1: Upload from your computer
- Click “Choose File”
- Upload your digital file
- WooCommerce saves it in a secure folder
Option 2: External URL
- Use Google Drive, Dropbox, or other cloud storage
- Paste the direct download link
- Good for large files (500MB+ videos)
I use WordPress uploads for files under 50MB, Proton Drive, Dropbox, or iDrive for larger stuff.
Download Limit: Leave blank (uses default from settings) or customize per product
Download Expiry: Leave blank (uses default) or set product-specific timeframe
Click “Add File” to save. Add multiple files if your product includes bonuses.
Inventory Tab:
Stock Status: In Stock (always in stock for digital products)
Sold individually: Check this if you only want customers buying one per order
- I check this for one-time access products
- Leave unchecked for templates/assets, people might gift
Advanced Tab:
Purchase Note: Optional message shown after purchase
Example: “Thanks for purchasing! Download links are on this page and emailed to you. Check spam if you don’t see it.”
Product Image:
Upload a product mockup or cover image. This shows on your shop page and in marketing.
Tools I use for quick mockups:
- Canva (free templates)
- Placeit by Envato ($29/month, unlimited mockups)
- DIY in Photoshop if I’m feeling fancy
Categories and Tags:
Organize products with categories:
- eBooks
- Templates
- Courses
- Printables
Add tags for better searchability.
Click “Publish”
Your first digital product is LIVE. 🎉
But don’t pop the champagne yet, we need to test it.
Step 4: Set Up Payment Gateways (How You Actually Get Paid)
You’ve got products. Now you need to get paid for them.
Best Payment Gateways for Digital Products:
Stripe (my recommendation)
- Accepts credit/debit cards, Apple Pay, Google Pay
- 2.9% + 30¢ per transaction (US)
- Instant payouts to bank account (2 days standard, instant for 1% fee)
- Excellent fraud protection
- Clean checkout experience
PayPal
- Trusted by customers worldwide
- 2.9% + 30¢ per transaction
- Some customers prefer PayPal over cards
- Payouts to the bank take 1-3 days
WooCommerce Payments (powered by Stripe)
- Native WooCommerce solution
- Same pricing as Stripe
- Manage everything in the WordPress dashboard
- Easiest setup
I use both Stripe and PayPal. Offering multiple payment options increases conversion by about 10-15% in my experience.
Note: Stripe is not supported in several countries, and I find that limiting for creators in those regions.
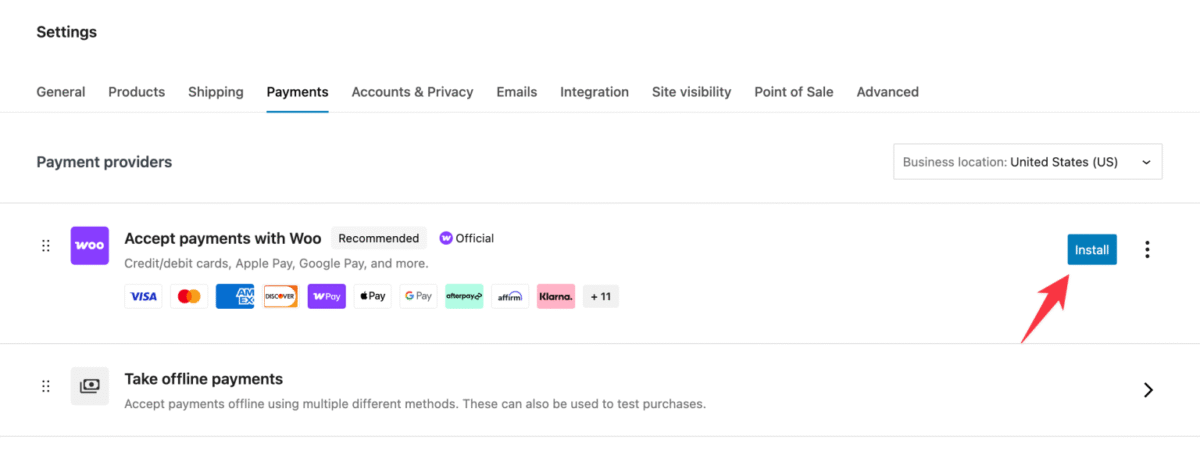
Setting Up Stripe:
- Go to: WooCommerce → Settings → Payments
- Enable “Stripe” (toggle it on)
- Click “Set up” or “Manage”
- Connect your Stripe account (create one at stripe.com if you don’t have one)
- Enter API keys (Stripe provides these after account creation)
- Enable “Apple Pay” and “Google Pay” for faster checkouts
- Save changes
Setting Up PayPal:
- Go to: WooCommerce → Settings → Payments
- Enable “PayPal” (toggle on)
- Click “Manage”
- Enter your PayPal email address
- Choose API method: PayPal Checkout (easiest) or PayPal Payments Pro (requires $30/month PayPal subscription)
- Save changes
Test Both Payment Methods:
Create a test product at $0.50 and buy it yourself. Verify:
- Payment processes correctly
- The download link appears immediately
- Email confirmation arrives
- Money shows in your payment gateway dashboard
If anything breaks, fix it before launching to real customers.
Step 5: Configure Email Notifications (Don’t Forget This)
Your customers need download links emailed to them immediately. WooCommerce handles this automatically, but you need to customize the emails so they don’t look generic and spammy.
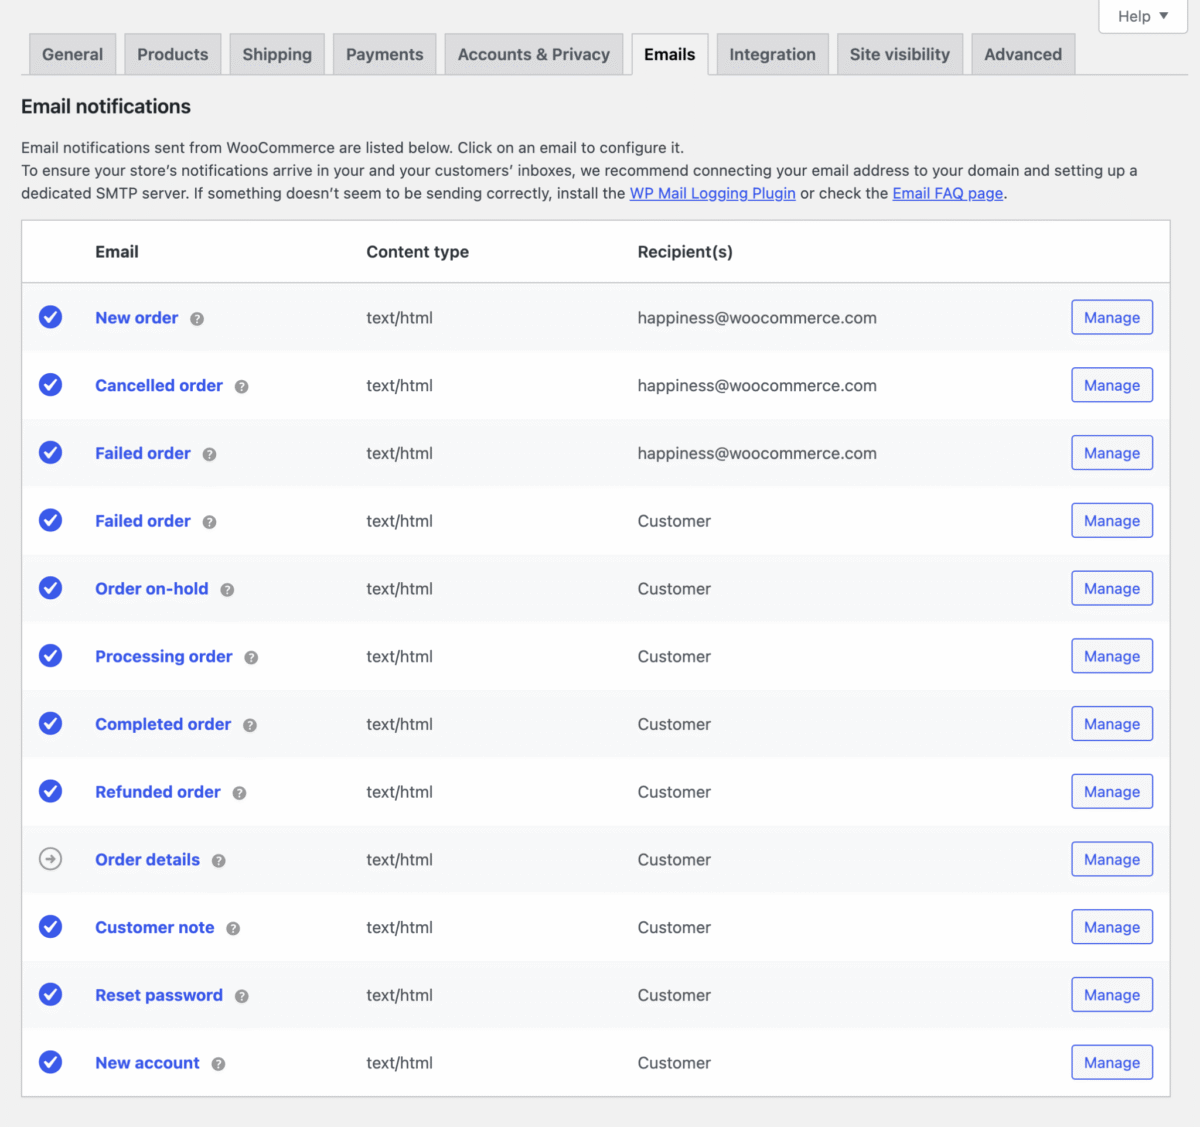
Customize Email Templates:
Go to: WooCommerce → Settings → Emails
You’ll see several email types. The important ones for digital products:
Completed Order – Sent when order is marked complete (includes download links)
Click “Manage” next to Completed Order:
- Enable: YES
- Email heading: “Your Download is Ready!”
- Additional content: Add helpful info like “Download links expire in 7 days. Save files to your device.”
- Save changes
Processing Order – Sent immediately after payment (before fulfillment)
For digital products, download access is usually granted after payment clears, not after “complete” status. Make sure your settings reflect this.
Test Emails:
Use a plugin like SMTP2GO or fluentSMTP to ensure emails are actually delivered.
Gmail, Yahoo, and Outlook often mark WooCommerce emails as spam if sent from shared hosting without proper authentication.
An SMTP plugin fixes this.
I use SMTP2GO, WP Mail SMTP with SendGrid (free up to 100 emails/day, then $15/month for 40K emails). My delivery rate went from 60% to 98% after setting this up.
Step 6: Test the Complete Customer Experience

Before you announce your digital products to the world, walk through the entire customer journey yourself.
Complete Purchase Test:
- Add product to cart (as a logged-out user)
- Go through checkout (use a different email than your admin)
- Complete payment (use Stripe test mode or PayPal sandbox)
- Check for the download link on the order confirmation page
- Check email for the download link
- Click the download link and verify file downloads correctly
- Log in to your account and verify download is accessible from the “My Account” page
- Test download limit (download multiple times to verify limit works)
- Wait 2-3 days and test the download link again (verify expiration if set)
Common Issues I’ve Encountered:
❌ Download link not appearing = Check “Grant access after payment” is enabled
❌ Email not arriving = Set up SMTP plugin
❌ File times out during download = File too large or hosting too weak
❌ Download link shows 404 error = File permissions issue or incorrect URL
❌ Customer can’t find downloads = Customize “My Account” page to make downloads obvious
Fix these before going live.
Step 7: Protect Your Digital Products (Don’t Get Ripped Off)
Digital products are easy to steal if you don’t protect them. Here’s how I prevent theft without being annoyingly restrictive.
Security Measures I Actually Use:
1. Login Requirements: Already set this up earlier (Downloads require login). Keeps casual link-sharing from working.
2. Download Limits: 3-5 downloads prevent abuse while giving legitimate customers flexibility.
3. Download Expiration: 7-day expiration with account access for new links balances security and convenience.
4. Watermarks on PDFs For high-value products ($100+), I add subtle watermarks with purchase email addresses using tools like:
- Adobe Acrobat Pro
- PDFElement
- Online tools like Sejda
Psychological deterrent, people are less likely to share if their email is on every page.
5. License Keys for Software. If selling WordPress plugins, themes, or software, use license key systems:
- WooCommerce License Manager plugin
- Easy Digital Downloads (EDD) with Software Licensing extension
6. External Storage with Expiring Links. For video courses, I store files on Vimeo or Bunny CDN with domain restrictions and expiring embed codes. Customer watches from my site, can’t download raw files.
What I DON’T Do:
❌ PDF encryption – Annoying for legitimate customers, easily cracked anyway
❌ Download restrictions are so tight that customers get frustrated
❌ DRM for eBooks – Kills user experience
Balance security with usability. Some piracy will happen. Accept it and focus on serving paying customers well.
Step 8: Optimize Your Product Pages for Conversions
You can have the best digital product in the world, but if your product page sucks, nobody buys it.
Elements of High-Converting Product Pages:
1. Clear, Benefit-Driven Headlines
Bad: “Social Media Template Pack”
Good: “50 Ready-to-Post Social Media Templates That Book You More Clients”
2. High-Quality Product Mockup
Show what they’re getting. I use:
- Mockup photos of PDFs on iPad/laptop
- Screenshots of templates in action
- Video previews (15-30 seconds)
3. Bullet Points of What’s Included
People scan. Make it easy:
- ✅ 50 Canva templates (editable)
- ✅ Instagram, Facebook, LinkedIn sizes
- ✅ Bonus: Content calendar template
- ✅ Lifetime updates included
- ✅ Commercial license (use for clients)
4. Social Proof
Screenshots of testimonials, reviews, or customer wins. Even 3-5 testimonials increase conversions by 15-20%.
Before I had testimonials, I shared my own results: “I used these exact templates to grow my Instagram from 400 to 4,000 followers in 90 days.”
5. FAQ Section
Answer objections before they become reasons not to buy:
- What file format?
- Can I edit these?
- Do I need special software?
- What’s your refund policy?
- Can I use these for client work?
6. Clear Call-to-Action
“Add to Cart” is boring. Try:
- “Get Instant Access”
- “Download Now”
- “Start Creating Today”
7. Urgency (If Honest)
If running a limited-time sale, show a countdown timer. But don’t fake scarcity—it backfires when customers realize you’re full of shit.
Plugins That Help:
- Elementor or Beaver Builder – Page builder for custom product layouts
- WooCommerce Product Add-Ons – Let customers select variations or add-ons
- YITH WooCommerce Wishlist – Customers save products for later
- Trust Badges – Show security badges near “Add to Cart”
Advanced Tips for Selling Digital Products with WooCommerce
Once you’ve got the basics down, level up with these tactics.
1. Create Product Bundles
Sell multiple products together at a discount using the WooCommerce Product Bundles plugin.
Example:
- Blogging eBook: $29
- Email templates: $19
- Social media pack: $19
- Bundle all three: $49 (save $18)
Increases average order value significantly. My bundles sell 3x more than individual products.
2. Offer Subscriptions
Convert one-time buyers into recurring revenue with the WooCommerce Subscriptions plugin ($199/year).
Ideas:
- Monthly template packs
- Weekly PLR content
- Exclusive tutorials delivered monthly
- Ongoing software updates
I added a $19/month template subscription in 2023. Now earning $380/month recurring from 20 subscribers. Small but growing.
3. Upsells and Cross-Sells
Recommend related products at checkout:
- Upsells: More expensive alternative (“Upgrade to Pro version for $20 more”)
- Cross-sells: Complementary products (“Customers also bought…”)
Set these in the Product Data → Linked Products tab.
My upsells convert at about 12%, which is pure profit since the customer is already buying.
4. Implement License Tiers
Offer different licenses at different price points:
- Personal License: $29 (use for yourself)
- Commercial License: $79 (use for clients, charge for your work)
- Extended License: $149 (resell as part of your products)
Use WooCommerce Product Variations to create dropdown options.
I tripled revenue on my template packs just by adding commercial licensing.
5. Create Members-Only Digital Products
Use WooCommerce Memberships to:
- Gate premium downloads
- Offer member discounts
- Create exclusive product access
Builds a loyal community that pays monthly for special access.
6. Abandoned Cart Recovery
20-30% of people add products to the cart but don’t complete the purchase. Get them back with the Abandoned Cart Lite plugin (free) or CartFlows (premium).
Automatically email customers who abandoned, reminding them and maybe offering a small discount (5-10%).
Recovered about 15% of abandoned carts doing this, which added $200-300/month.
7. Leverage Limited-Time Discounts
Create urgency with sales:
- Launch discount (first 48 hours)
- Black Friday / Cyber Monday
- Newsletter-exclusive deals
Use the Smart Coupons for WooCommerce plugin to create:
- Percentage discounts
- BOGO deals
- Gift certificates
- Store credits
I run quarterly sales, and they account for 40% of annual revenue.
Best WooCommerce Plugins for Digital Products
These plugins make selling digital products easier and more profitable.
Essential Plugins:
WooCommerce (free) – Obviously
WooCommerce Stripe Gateway (free) – Accept credit cards
WP Mail SMTP (free) – Ensure email delivery
Recommended Paid Plugins:
WooCommerce Subscriptions ($199/year)
Recurring revenue from digital products
WooCommerce Memberships ($199/year)
Create members-only content and downloads
WooCommerce Product Bundles ($49/year)
Bundle products for a higher average order value
Easy Digital Downloads (free alternative to WooCommerce, specifically for digital products)
License Manager for WooCommerce ($99/year)
Generate and manage license keys for software
CartFlows ($299/year)
Sales funnels, upsells, and order bumps
FunnelKit (Starting $99/year)
One-click upsells and checkout optimization
YITH WooCommerce PDF Invoice ($79.99/year)
Professional invoices for customers
Free Plugins Worth Using:
Checkout Field Editor – Customize checkout fields
UpdraftPlus – Backup your site (critical!)
Really Simple SSL – Force HTTPS
Wordfence Security – Protect from hackers
Supercharge Your Store: Find Plugins That Do the Heavy Lifting ⟶
Common Mistakes (And How to Avoid Them)

After three years and probably $2K lost to stupid mistakes, here’s what NOT to do.
Mistake 1: Not Testing Downloads Before Launching
I once launched a template pack where the ZIP file was corrupted. Fifty customers bought it before someone emailed me. Spent the next 4 hours issuing refunds and re-uploading files.
Solution: Always test the complete purchase flow yourself first.
Mistake 2: Setting Download Limits Too Low
Had downloads set to 1 per purchase. The customer downloaded it on a laptop, then wanted it on an iPad. Emailed me asking for another download. I get 10+ support requests like this weekly.
Solution: 3-5 downloads is the sweet spot. Give customers flexibility.
Mistake 3: No Clear Product Preview
Sold an eBook without showing what’s inside. High cart abandonment rate. People don’t buy what they can’t see.
Solution: Show preview pages, table of contents, or sample files. Reduce purchase anxiety.
Mistake 4: Ignoring Email Deliverability
My order confirmation emails went to spam for 40% of customers. They’d panic thinking the purchase failed, request refunds, or email support.
Solution: Set up WP Mail SMTP with SendGrid, Mailgun, or similar. Non-negotiable.
Mistake 5: No Refund Policy
The customer requested a refund after downloading my template 4 times. I had no policy in place. Lost $79 and learned a lesson.
Solution: Clear refund policy on every product page. Mine is “14-day money-back guarantee if you’re not satisfied, unless you’ve downloaded files more than once.”
Mistake 6: Not Backing Up Regularly
Hosting crashed. Lost product data and orders from the past week. Cried. Rebuilt everything manually.
Solution: Automated daily backups using UpdraftPlus or your hosting’s backup feature. Store off-site (Dropbox, Google Drive).
Mistake 7: Overwhelming Checkout
Asked for phone number, company name, address, and birthdate at checkout for digital products. Cart abandonment was 70%.
Solution: For digital products, you need name, email, and payment. That’s it. Remove unnecessary fields using the Checkout Field Editor plugin.
Your Store Called. It’s Ready ⟶
Marketing Your Digital Products
Creating products is 50% of the battle. Getting people to actually buy them is the other 50%.
Strategies That Honestly Worked for Me:
1. Email List (Most Important)
Built an email list of 1,200+ subscribers in 2023. Every product launch generates $800-$ 1,500 in sales. Email converts at 5-8%, which is insane compared to social media (0.5-1%).
Use Kit or Beehiiv (both have free plans) to build your list.
2. Free Lead Magnet Funnel
Offer a free template/PDF/checklist in exchange for an email. Then, email sequence promoting paid products.
My free “Blogging Starter Kit” converts at a 35% opt-in rate. Then 8% of those eventually buy a paid product.
3. SEO Content
Wrote blog posts ranking in Google for “Notion templates,” “Canva templates,” etc. These posts link to my products.
Took 6-8 months to see traction, but now accounts for 30% of sales on autopilot.
4. Pinterest (Underrated for Digital Products)
Created pins linking directly to product pages. Generated 200-300 clicks/month, converting at 3%.
Pinterest loves templates, planners, and printables. If that’s what you sell, you’re leaving money on the table without it.
5. Social Proof and Reviews
Started asking customers for testimonials via email follow-up (7 days after purchase). Added them to product pages.
Conversion rate jumped from 2.1% to 3.8% after adding testimonials.
6. Affiliates
Let other bloggers promote my products for 30% commission using the AffiliateWP plugin.
Recruited 8 affiliates who collectively drive 15-20% of monthly sales. Win-win.
7. Product Launch Strategy
When launching new products:
- Teaser email series (3-5 days before)
- Early bird discount (first 48 hours)
- Social media posts
- Partnerships/collaborations with similar creators
My launches average 40-60 sales in the first week, then drop to 5-10/week ongoing.
My Current Digital Product Tech Stack (2025)
Here’s exactly what I use to run my digital product business:
Core:
- WordPress (self-hosted)
- WPX Hosting ($24.99/month)
- WooCommerce (free)
- Astra Theme (free)
Payments:
- Stripe (2.9% + 30¢)
- PayPal (2.9% + 30¢)
Email:
- Kit ($29/month for 1,000+ subscribers)
- WP Mail SMTP (free) + SendGrid (free tier)
Essential Plugins:
- UpdraftPlus (free) – Backups
- Wordfence Security (free)
- FastPixel – Caching
- Smush (free) – Image optimization
Sales Optimization:
- CartFlows ($299/year) – Checkout optimization
- AffiliateWP ($149/year) – Affiliate program
- Pretty Links (free) – Link management
Creation Tools:
- Canva Pro ($120/year) – Graphics and mockups
- Adobe Acrobat ($179/year) – PDF editing
- Notion (free) – Product planning
- Google Workspace ($72/year) – Business email
Total Monthly Cost: ~$180-200 (excluding payment processing fees)
Annual Revenue: ~$42,000 projected
Profit Margin: ~93% (after hosting/tools, before taxes)
Not glamorous. No fancy software. Just proven tools that work.
What I’d Do Differently If Starting Today
After four years of selling digital products, here’s what I’d change:
1. Start with ONE Signature Product
I launched with four products simultaneously. Spread myself too thin. None was great.
Better approach: Create ONE exceptional product priced at $47-97. Make it your best work. Market the hell out of it. Build an audience around it. THEN expand.
2. Build Email List First
I created products before building an audience. Had nobody to sell to at launch.
Smarter move: Spend 3-6 months building an email list with free content and lead magnets. Then launch a paid product to a warm audience who already trusts you.
3. Focus on Higher-Priced Products
My first products were $9-19. After payment fees and time invested, barely worth it.
Sweet spot for digital products: $37-97. High enough to be meaningful income, low enough that the purchase decision is easy.
4. Video Sales Pages Convert Better
I used text-only product pages for two years. Added video demonstrations in 2023. Conversion rate jumped from 2.1% to 3.9%.
People want to see what they’re buying. Show them.
5. Fewer Products, Better Marketing
I have 22 products. Only 5 of them drive 80% of the revenue. The other 17 are distractions requiring updates and support.
Better strategy: 5-8 exceptional products with clear positioning, heavily marketed. Quality over quantity.
6. Invest in Professional Mockups
My early product images were DIY screenshots. Looked cheap. Converted poorly.
Hired a designer on Fiverr for $45 to create professional mockups. Sales increased 30% for that product. Best $45 I ever spent.
Action Plan: Launch Your First Digital Product in 30 Days
Overwhelmed? Here’s a realistic 30-day roadmap.
Week 1: Setup
- Day 1-2: Install WordPress, hosting, WooCommerce
- Day 3-4: Configure WooCommerce settings for digital products
- Day 5-6: Set up payment gateways (Stripe + PayPal)
- Day 7: Create terms, privacy policy, and refund policy
Week 2: Product Creation
- Day 8-10: Create your digital product (eBook, template, whatever)
- Day 11-12: Design product mockup/cover
- Day 13-14: Write product description and sales copy
Week 3: Store Setup
- Day 15-16: Upload product to WooCommerce
- Day 17-18: Create product page with mockups, descriptions, FAQs
- Day 19-20: Test complete purchase flow
- Day 21: Fix any issues found during testing
Week 4: Launch Prep
- Day 22-24: Create launch content (email, social media, blog post)
- Day 25-26: Set up email automation and follow-up sequences
- Day 27-28: Soft launch to friends/small audience
- Day 29: Gather feedback, make final tweaks
- Day 30: OFFICIAL LAUNCH
This timeline assumes you’re working a few hours per day. Adjust based on your schedule.
The key is shipping. An imperfect product launched beats a perfect product planned.
Final Thoughts on Selling Digital Products with WooCommerce
Four years ago, I had no idea how to sell digital products online. I was scared of technology, overwhelmed by plugins, and convinced I needed to be some tech genius to figure this out.
Turns out, you don’t need to be a genius. You just need to follow the steps, test everything, and fix issues as they come up.
Here’s what I know now:
WooCommerce isn’t perfect. The initial setup takes time. You’ll encounter frustrating bugs. Customer support will sometimes make you want to scream into a pillow.
But it works.
It’s flexible, powerful, and most importantly, YOU own it. No platform can shut you down, change their fees, or delete your account. Your products, your customer data, your business.
The formula that actually works:
- Create something genuinely helpful (not just “another template pack”)
- Set up WooCommerce properly from day one (follow this guide)
- Test everything before launching
- Build an email list (this cannot be overstated)
- Market consistently (launches + ongoing promotion)
- Iterate based on customer feedback
- Scale what’s working, kill what’s not
Is it easy? No.
Is it worth it? Absolutely.
My digital products earned me good $$$ last year, I traveled, and worked on other projects. That’s not “quit your job” money (yet), but it’s real passive income that compounds over time.
Start small. Ship something. Improve as you go.
You don’t need 50 products. You need ONE good product and the courage to put it out there.
The setup I outlined in this guide took me three years and many mistakes to figure out. You can do it in 30 days by following these exact steps.
So stop overthinking. Stop waiting for perfect. Go set up WooCommerce and ship your first digital product.
Your future self (and bank account) will thank you.
– Mia
FAQs
Can I sell digital products on WooCommerce without a physical store?
Absolutely. WooCommerce handles digital-only stores perfectly. You just need WordPress, hosting, the WooCommerce plugin, and a payment gateway. No physical location, inventory, or shipping logistics required.
I’ve been selling purely digital products since 2020 with zero physical inventory. Works beautifully.
What types of digital products can I sell with WooCommerce?
Pretty much anything digital:
- eBooks (PDF, ePub, Mobi)
- Templates (Canva, Notion, Google Sheets, Excel)
- Graphics and photos (PNG, JPG, SVG)
- Printables (planners, worksheets, wall art)
- Music and audio (MP3, WAV)
- Videos and courses (MP4, MOV)
- Software and plugins (ZIP files)
- Fonts and design assets
- Stock photos and vectors
- PLR content
- Checklists and guides
If it’s a file, WooCommerce can sell it.
Do I need WooCommerce Subscriptions to sell digital subscriptions?
Not technically. WooCommerce core can handle simple recurring payments with the right payment gateway (like Stripe with recurring billing).
But the WooCommerce Subscriptions plugin ($199/year) makes it dramatically easier with features like:
- Automatic billing at intervals (weekly, monthly, yearly)
- Free trials
- Sign-up fees
- Subscription management for customers
- Renewal reminders
- Failed payment recovery
Worth the investment if subscriptions are core to your business model.
How do I handle taxes on digital products?
Tax rules for digital products are complicated and vary by location.
US Sellers:
- Some states tax digital goods, others don’t
- You only collect sales tax if you have “nexus” in that state
- Use the TaxJar plugin (connects to WooCommerce, calculates automatically)
EU Sellers:
- Must collect VAT on digital products sold to EU customers
- The rate depends on the customer’s country, not yours
- Use the WooCommerce EU VAT Number plugin
General Advice: Consult with a tax professional or accountant familiar with e-commerce. Tax mistakes are expensive. You can pay an accountant $500/year to handle this, worth every penny.
What’s the best way to deliver large files (500MB+) through WooCommerce?
Large files timeout during download on most hosting. Solutions:
Option 1: Cloud Storage Links
- Upload files to Proton Drive, Dropbox, Google Drive, or Amazon S3
- Use direct download links as your product file URL
- Customer downloads directly from cloud storage (fast, no server load)
Option 2: Video Hosting Platforms
- For video courses, host on Vimeo, Wistia, or Bunny CDN
- Embed videos on members-only pages
- More secure than allowing direct downloads
Option 3: External Digital Delivery Services
- SendOwl or FetchApp handles file delivery separately
- WooCommerce processes payment, external service delivers files
- Costs $10-30/month extra
I use Dropbox for large file downloads (over 200MB). Cheaper than upgrading hosting just for occasional big files.
How do I prevent my digital products from being pirated or shared?
You can’t prevent piracy 100%, but you can make it harder:
Effective Deterrents:
- Require login to download (already covered)
- Download limits (3-5 maximum)
- Download expiration (7-30 days)
- Watermark PDFs with customer email/name
- License keys for software (WooCommerce License Manager)
- Use secure file delivery (forced downloads, not direct links)
Accept Some Piracy Will Happen:
- Don’t obsess over it
- Focus on serving paying customers well
- Build a community around your products
- The price is reasonable, so piracy isn’t tempting
I’ve had products shared on torrent sites. Annoying? Yes. Worth stressing over? Not really. Most people are honest if you treat them well.
Should I use WooCommerce or Easy Digital Downloads for selling digital products?
Both work. Here’s the breakdown:
WooCommerce:
- More popular (5M+ active installs vs. EDD’s 50K+)
- Better for mixed stores (physical + digital)
- More plugins and extensions are available
- More complex setup
- More features overall
Easy Digital Downloads:
- Built specifically for digital products
- Simpler, cleaner interface
- Lighter weight (faster)
- Perfect for digital-only stores
- Fewer extensions, but covers basics well
My Take: I started with WooCommerce because I already knew it, and might add physical products later. If you’re selling ONLY digital products and want simplicity, EDD is fantastic. If you want more flexibility and ecosystem, go with WooCommerce.
Can I offer free digital products with WooCommerce?
Yes! Set the price to $0. Customer “purchases” for free and gets download links.
Great for:
- Lead magnets
- Free samples
- Launch giveaways
- Building your email list
You can even require email signup for free products using WooCommerce Free Gift Coupons or simple account creation.
How do I handle customer support for digital products?
Most common support requests for digital products:
“Download link expired” – Send new link from WooCommerce → Orders → View order → Resend download permissions
“File won’t open” – Usually a PDF reader issue or a corrupted download. Have them re-download or try a different device
“Can’t find my download” – Point them to My Account → Downloads page
“Need to download on another device” – If within download limit, they can download again. If exceeded, manually reset the limit in the order details
“Requesting refund” – Have a clear refund policy. I honor requests within 14 days unless excessive downloading indicates abuse
Use Help Scout ($20/month) or Zendesk ($49/month) for organized support ticket management. Or just handle via email if volume is low (under 20 tickets/month).
What payment methods should I offer for digital products?
Minimum: Credit/debit cards via Stripe
Recommended additions:
- PayPal (trusted by older demographics and international customers)
- Apple Pay / Google Pay (faster checkout, higher conversion)
- Buy Now Pay Later options (Klarna, Afterpay) for products over $100
I offer Stripe and PayPal. Covers 99% of customers. Adding Apple Pay has increased conversion by about 8% since checkout is literally one click.
How do I create a professional-looking checkout page?
Default WooCommerce checkout works, but looks dated. Improve it:
Quick Wins:
- Remove unnecessary fields (Checkout Field Editor plugin)
- Add trust badges near the payment button
- Show security icons (SSL, money-back guarantee)
- Clear progress indicator
- Mobile-optimized design
Premium Solutions:
- CartFlows ($299/year) – Beautiful checkout pages, one-click upsells
- CheckoutWC ($99/year) – Modern checkout design
- FunnelKit ($99/year) – Conversion-optimized checkout
My checkout abandonment dropped from 68% to 52% after redesigning with CartFlows. Small investment, huge return.
Can I sell digital products in multiple currencies?
Yes, using multi-currency plugins:
- WooCommerce Multi-Currency (free, basic)
- WPML + WooCommerce Multilingual ($99/year, advanced)
- Aelia Currency Switcher ($79, one-time)
Automatically converts prices based on customer location or lets them choose currency manually.
I don’t use multi-currency because 95% of my customers are US-based, but if you’re targeting global markets, it’s worth implementing. Increases international conversions by 15-20%.
How do I offer discount codes for my digital products?
Built into WooCommerce core. No plugin needed.
Go to: Marketing → Coupons → Add Coupon
Create codes for:
- Percentage discounts (20% OFF)
- Fixed amount discounts ($10 OFF)
- Free shipping (not needed for digital products)
- BOGO deals
Set restrictions:
- Minimum purchase amount
- Specific products only
- Usage limit per customer
- Expiration date
- First-time customers only
I run quarterly sales with 25% off codes. Announce via email and social media. Drives 40% of my quarterly revenue during those weeks.
What’s the best way to organize multiple digital products?
Use categories and tags smartly:
Categories (main buckets):
- eBooks
- Templates
- Courses
- Graphics
- Printables
Tags (specific details):
- Canva
- Notion
- Marketing
- Productivity
- Beginner-friendly
Create a shop page showing all products with filtering by category/tag. WooCommerce does this automatically at yoursite.com/shop.
Use the Product Table plugin ($99) for searchable, filterable product tables. Makes browsing easier when you have 20+ products.
P.S. The biggest difference between people earning $100/month and $3,000/month from digital products? The second group launched more products and marketed consistently. That’s it. No secret sauce.
P.P.S. If your first product flops (mine did), you didn’t fail. You learned what doesn’t work. Create something better. Keep shipping.
P.P.P.S. Back up your site before installing ANY plugins. I learned this the hard way when a plugin conflict deleted three product listings. Had backups, restored in 10 minutes. No backups would’ve been catastrophic.